Thursday, November 27, 2014

Spiced Apple Cider Cinnamon Baked Donuts


I love donuts but rarely eat them. Not because they are really any worse than most desserts but for some reason in my mind I think of them that way. Well for Thanksgiving, Russell and I have a tradition of running the Turkey Trot together and this year we did the 10k. Perfect excuse to now bake and eat insanely delicious homemade donuts. These are probably some of the best donuts I have ever had. Exactly how I like them. Sweet but not too sweet, warm, and literally melts in your mouth. Plus the cider and cloves make your house smell like a Christmas wonderland. These donuts are also paired best with a warm Starbucks coffee :) Hope you enjoy! 


Ingredients:

For the Donut

  • 2 cups Apple Cider
  • 2 Whole Cloves
  • 2 Cups All-Purpose Flour
  • 1-1/2 teaspoon Baking Powder
  • 1-1/2 teaspoon Baking Soda
  • 1 teaspoon Cinnamon
  • 1/4 teaspoon Salt
  • 1 large Egg
  • 2 tablespoons salted butter, melted
  • 2/3 cup light Brown Sugar
  • 1/2 cup Buttermilk
  • 2 tablespoons Apple Sauce, naturally sweetened- no sugar added
  • 1 teaspoon Vanilla Extract

For the Cinnamon Sugar Coating

  • 3 tablespoons Butter, melted
  • 1/2 cup Granulated Sugar
  • 1 tablespoon Cinnamon


Directions:

  1. Start by simmering the apple cider with the 2 cloves in a small saucepan over medium heat for 15-20 minutes until the apple cider reduces down to 1/2 cup. Remove the cloves from the concentrate and pour the cider into a container and refrigerate while you prepare the donut batter. 
  2. Preheat the over to 350 degrees. Spray a donut pan with non-stick cooking spray and set aside.
  3. In a large bowl, toss together the flour, baking powder, baking soda, cinnamon and salt. Set aside. 
  4. In a medium bowl, combine the egg, melted butter, and brown sugar, whisk until smooth. Then, add in the apple sauce, vanilla, buttermilk, and the apple cider concentrate. 
  5. Add the wet ingredients to the dry ingredients and whisk until just combined. It's okay if a few small lumps remain.
  6. Pour the batter by the teaspoon into the prepared pan about 3/4 of the way full. Make sure to not overfill. 
  7. Bake donuts about 10-12 minutes. 

For the cinnamon sugar coating:

  1. In a medium bowl, combine the sugar and cinnamon together. 
  2. Dip the tops of each donut hole into the melted butter then coat with the cinnamon and sugar mixture. Repeat with all the donuts. 

Donuts taste best the same day but can be stored up to 2 days if tightly wrapped and kept at room temperature.


Thank you littlespicejar for this amazing and somewhat healthier donut recipe!
 Hope you had a wonderful Thanksgiving!

Friday, October 31, 2014

Pumpkin Glory Muffins


It's October! And by October I mean pumpkin time. Pumpkin is one of my favorite things in the entire world. So when Russell came home this time he knew he would be baking something with pumpkin in it and he did not disappoint. These are perfect pumpkin muffins with just a little bit of sweetness on top. You can of course add however much streusel on top you would personally like! I have devoured these this past week. They go perfectly with my coffee in the morning and just makes my day sweet as soon as I wake up. 

Ingredients

  • 1/4 cup Butter, softened
  • 1/2 cup Sugar
  • 1/4 cup Packed Brown Sugar
  • 2/3 cup Canned Pumpkin
  • 1/2 cup Buttermilk
  • 2 Eggs, lightly beaten
  • 2 tbsp Molasses
  • 2 cups All-Purpose Flour
  • 1 tsp Baking Soda
  • 1/2 tsp Baking Powder
  • 1 tsp Pumpkin Pie Spice
  • 1/4 tsp Salt

Streusel Topping

  • 1/2 cup All-Purpose Flour
  • 3 tbsp Brown Sugar
  • 2 tbsp Cold Butter

Directions

  1. In a large bowl, cream butter and sugars until light and fluffy. Beat in the pumpkin, buttermilk, eggs, and molasses. Combine the flour, baking soda, baking powder, pumpkin pie spice and salt; gradually add to pumpkin mixture just until blended. 
  2. Fill greased or paper lined muffin cups 2/3 full.
  3. For topping- combine flour and brown sugar; cut in butter until mixture is crumbly. Sprinkle over batter. 
  4. Bake at 375 degrees for 20-25 minutes or until a toothpick inserted in the muffin comes out clean. 
  5. Cool in pam for 5 minutes before removing. 


Hello best and favorite time of the year. Happy Halloween everyone! 


Monday, October 27, 2014

Chicago


Every day I live in Houston I still can't believe how many people live in this city but then I visit the few other cities with even more people and I realize it's what makes these cities great.  In Chicago, I really love the hustle and bustle of everyone walking around with a variety of places to see and eat and explore. My husband and I were able to take a quick weekend trip here before the start of my new job. We were lucky enough to catch up with old friends, be tourists, and of course find our own cute little gems of the city that we always love to do! 

Stay:

Russell and I stayed at the Palmer House Hilton Hotel. We didn't get to do our usual Bed and Breakfast for this trip because honestly I couldn't find one I liked close enough to the city. So, this hotel is the next best thing. It was gorgeous, had a great breakfast, and most importantly perfect location to everything. We were in walking distance to every thing that we wanted to visit and there was also a metro stop right outside of the hotel for the airport or our day trip to Lincoln Park. Plus I love the pink lights for Breast Cancer Awareness month. I would definitely recommend this place if you are visiting Chicago!


Eat:

  • Lou Malnati's Pizza

There are two main deep dish pizza chains throughout Chicago. This one is personally my favorite as I feel like it has the perfect amount of sauce to cheese ratio (more cheese of course). I believe pizza is one of the best things offered on the planet and when I want to splurge, it is my cheat every time. This place will satisfy your Chicago deep dish pizza fix. You can't tell me that doesn't look good.


  • Portillo's Hot Dogs

Portillo's is the famous Chicago Hot Dog stop. This is a must do while in Chicago. It is usually crowded (with tourists mostly) but they have a system and move quickly and you'll be in and out with your delicious traditional Chicago dog. Remember no ketchup ;)


  • RPM Italian Restaurant

RPM was my favorite restaurant in Chicago. It was so insanely delicious. Seriously, every single thing we tried was so good and I was actually sad when each dish was done. You will need to make a reservation pretty early in advance if you want a table or you can walk in and try and steal a seat in the bar area (which is what we did.) We couldn't decide what we wanted so we did more of a tapas style with a bunch of different small plates. Russell and I decided on the Truffled Garlic Bread, Prime Beef Meatballs, Zucchini Fritti, and Giuliana's Italian Salad. Then the best was yet to come with the dessert. Once again we couldn't choose just one so we split Pistachio Gelato and their special of the night which were these perfectly Fried Italian Doughnuts served with a side of Nutella. This is making my mouth water just writing this. I will go back to Chicago for this restaurant alone. Go.


  • La Fournette

Russ and I have an obsession for french bakeries/macaroons/almond croissants/ basically anything french. So any city we visit, we will search out what people say is the best. And this one comes close to one of the best we had tried. The almond croissant was perfectly baked and the almond paste was extremely if not exactly similar to the way they make it in Paris. The macaroons were also delicious with a lot of fun flavors to choose from. Another bonus is this bakery is located in Old Town which is one of my favorite areas of Chicago.


Friday, October 10, 2014

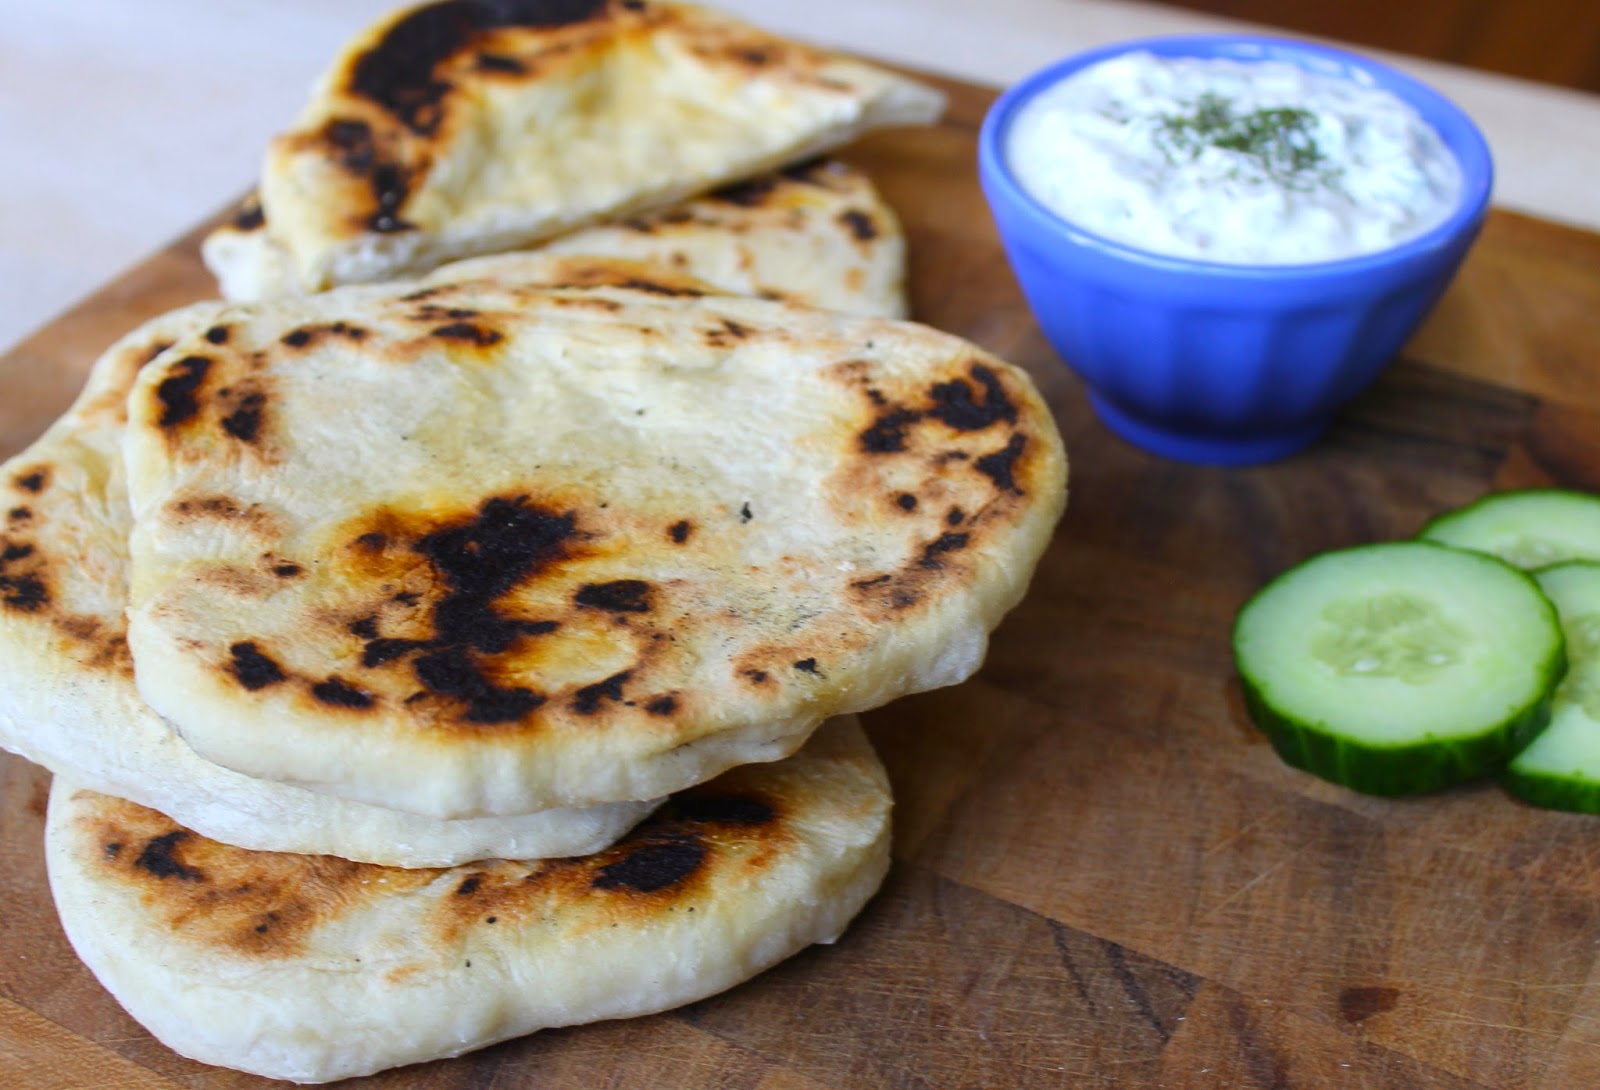
Best Pita Bread Ever with Creamy Homemade Tzatzkiki Sauce


Just yes. 

Russell and I may have a slight obsession with Mediterranean food but why not?! It's healthy, easy, and amazingly tasty! Since we had this obsession, we were visiting our favorite Mediterranean restaurant too often for our budget. So a few weeks ago we decided to try our own. Russell first started with the pita bread and after the first taste not only did he succeed but he passed my expectations. Seriously, it was the best pita I've ever had. For me personally, better than any restaurant pita I've had. Now this recipe will take a little more time and effort than our other recipes but we promise once you have these, you will never want another store bought pita again. Then we decided to take it even farther and go with the full package - Tzatziki sauce. Once again this sauce is healthy and so easy to make. I will be having this way too often from now on. For lunch we added chicken, feta, tomatoes, and onions for a perfect Mediterranean pita sandwich. We hope you enjoy! 

Ingredients

Pita Bread:

  • 1 cup hot Water, but not boiling
  • 2 teaspoons Active Dry or Instant Yeast (we used instant for this recipe)
  • 2-1/2 cups All-Purpose Flour  (may need to add a little more flour but do so sparingly)
  • 2 teaspoons Salt
  • 1 tablespoon Olive Oil

Tzatziki Sauce:

  • 16 ounces Plain Greek Yogurt (we used full fat - sorry diet)
  • 1 regular Cucumber, peeled, seeded, and diced small
  • 3 cloves Garlic, minced
  • 1 tablespoon White Wine Vinegar
  • 1 teaspoon Dried Dill
  • 1 teaspoon Dried Oregano
  • Half a fresh Lemon, juiced
  • 1 tablespoon Olive Oil


Directions

Pita Bread:

  1. Mix the yeast and hot water together, letting dissolve for ~5 minutes. 
  2. Using a stand mixer, add salt, olive oil, and 2-1/2 cups of flour to water mixture. Attach the dough hook and knead the dough on medium speed for 4-6 minutes until dough is smooth. You may add additional flour as needed to end up with a smooth and elastic dough. However, it is better to use too little flour than too much. 
  3. Place dough in greased bowl (I use olive oil) and turn until coated. Cover bowl and let dough rise until it's doubled (should take ~1 hour). 
  4. Once risen, deflate the dough and turn onto a lightly floured work surface. If not ready to bake, place dough in refrigerator for up to 4 days (Typically I only make 1/2 the pitas and save the other half for the next days meals). 
  5. Break off a small piece of dough (~2" ball) and gently flatten into a disk using a rolling pin (each disk should be 6-8" wide and 1/4" thick). Lift/turn the dough frequently as you flatten to make sure the dough doesn't stick to the counter. 
  6. Warm a cast iron skillet (using the iron skillet is the key to getting incredible pitas) over medium-high heat. Make sure the pan is good and hot prior to cooking any pitas. 
  7. Place flattened disk on pan and bake for 30-45 seconds, until bubbles begin to form. 
  8. Flip and cook for 1-2 minutes on other side. Pita will begin to puff up as toasted spots begin to form.  
  9. Flip additional time, cooking original side for an addition 1-2 minutes. Typically I cook each pita for a total of 4 minutes (I set timer for this time when I first place pita on the skillet) - exact time should be adjusted per your cooking surface/temperature and taste.
  10. Of course pitas are best eaten hot and fresh, but bread will keep in a bag for a few days as well!!

Tzatziki Sauce:

  1. Pour any liquid off the surface of the greek yogurt. (I used full fat here to make it thicker, but you can always go with 2% if you want it a little lighter)
  2. Mix together yogurt, diced cucumber, garlic, white wine vinegar, dill, oregano, salt and pepper to taste, and lemon juice. 
  3. Drizzle with olive oil.
  4. Refrigerate for at least 30 minutes before serving to allow the flavors to blend. 


Our next Mediterranean adventure will soon be hummus as that is our other obsession. But until then we hope you enjoy this insanely good, fresh pita bread and creamy tzatziki sauce!

UA-55116700-1